
Step 1: The Room
Now, growing pot requires some actual knowledge and a little bit of money up front. Don’t think that you can just stop by the store and be ready in an hour. You have to think out what your plan is. Where you’re going to start growing is just as important as how, so be prepared to think it out. Though weed plants can grow indoors or outdoors, you’re likely going to start inside. Unless you have a huge green house at your disposal, you need to choose a room that is dark and secluded. Of course, you will have to add light later, but for starters, lets imagine that you want to pick a quiet and dark space where your pot plants can safely grow. The trick is to find a room that still has access to ventilation or air. We will explain why later.Step 2: Supplies
Here is where it starts to get a little tricky. You need to make sure that you plants have what it takes to grow. The first thing is going to be the lights. Because you are growing inside, you will need to make sure that your plants are getting steady access to UV light. That is where lights come in.
- HID- These produce a ton of light, but often cost more than the other two. The other issue is that they are not efficient, so if you’re looking out for your energy bill you might want to think twice about HID.
- Fluorescent- These are the most traditional lights. You know these bulbs as the usual yellow that have been around for centuries. They are cheap and effective, though they don’t produce nearly as much light and are less efficient.
- LED- Until recently, you couldn’t find LED grow lights that were effective enough to be useful. But now, if you are willing to go a little on the higher end. You can find these very efficient bulbs that really have a ton of kick.
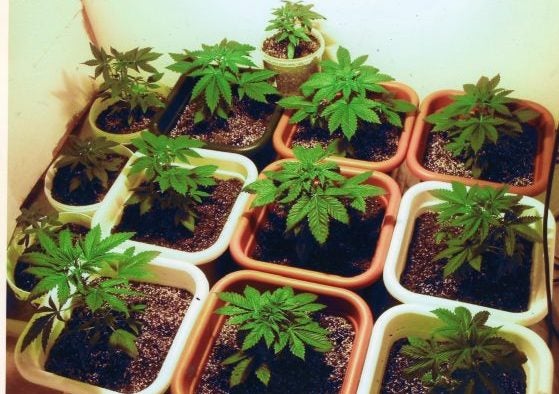
Step 3: The Seeds and the Soil
Now’s the time to start the growing operation in earnest. Once you have your room and lights, you can get to the good stuff. To get it out of the way, the soil is something you will have to consider, or the lack thereof. Traditionally, all plants needed soil to grow. More recently, growing plants can be done using hydroponics, which does not require soil. Hydroponics basically allow you to grow by feeding nutrients and minerals directly to the roots of the plant. It is effective and can grow things larger and faster, but is much more difficult and expensive. We recommend beginning with soil. Now, the seeds are the real fun part. You will want to find plants that grow indoors because that is what you are doing. Outside, stalks grow taller and have other options. Truthfully, your best bet is to pick your favorite strain, look it up and make sure you can grow it inside. We recommend one of the old classics, Northern Lights, to begin. Lastly, you will need to obtain plant nutrients to make sure that you buds are well taken care of. Fertilizer mix is the easiest way to do this instead of buying chemicals directly. Make sure to read about what the best fertilizers for bud are.Step 4: The Growing
Look into how long it takes for your buds to fully develop. Some can take up to 3 months, but others a little on the short side. No matter what, you will be able to tell as your buds flower. The most important thing for growing is the timing of your lights. You can’t just leave them on all day and night. You can buy many different products on the market, such as ones that monitor water and soil density, etc., but to start just pick up a traditional timer. While they are in their early stages, you want to shine 16 hours of light a day on your plants. You will then drop that number to 12 hours a day when it is time to let them bloom. You might want to check your solids pH levels as well. You can pick up test kits for cheap, so that you can keep your buds between 6-7 on the pH scale. The watering is actually a bit tricky because it depends on your climate, the plants you chose, and what stage of growth they are in. Check out a more comprehensive guide to learn what the best watering habits are for your specific operation. And there you have it. You’ll need to do some more research, but this should be a great launching point to start growing your own weed. Good luck and keep gardening!Order Marijuana at Doobdasher
Doobdasher offers a safe and secure online system to buy mail-order marijuana for residents across Canada. If you’re a first-time smoker, all of our marijuana is conveniently categorized by type and accompanied by easy-to-understand product descriptions, so you know exactly what you’re getting. Shop now and use the coupon code “doob10” to get 10% off your first order!